


スクリーンショット
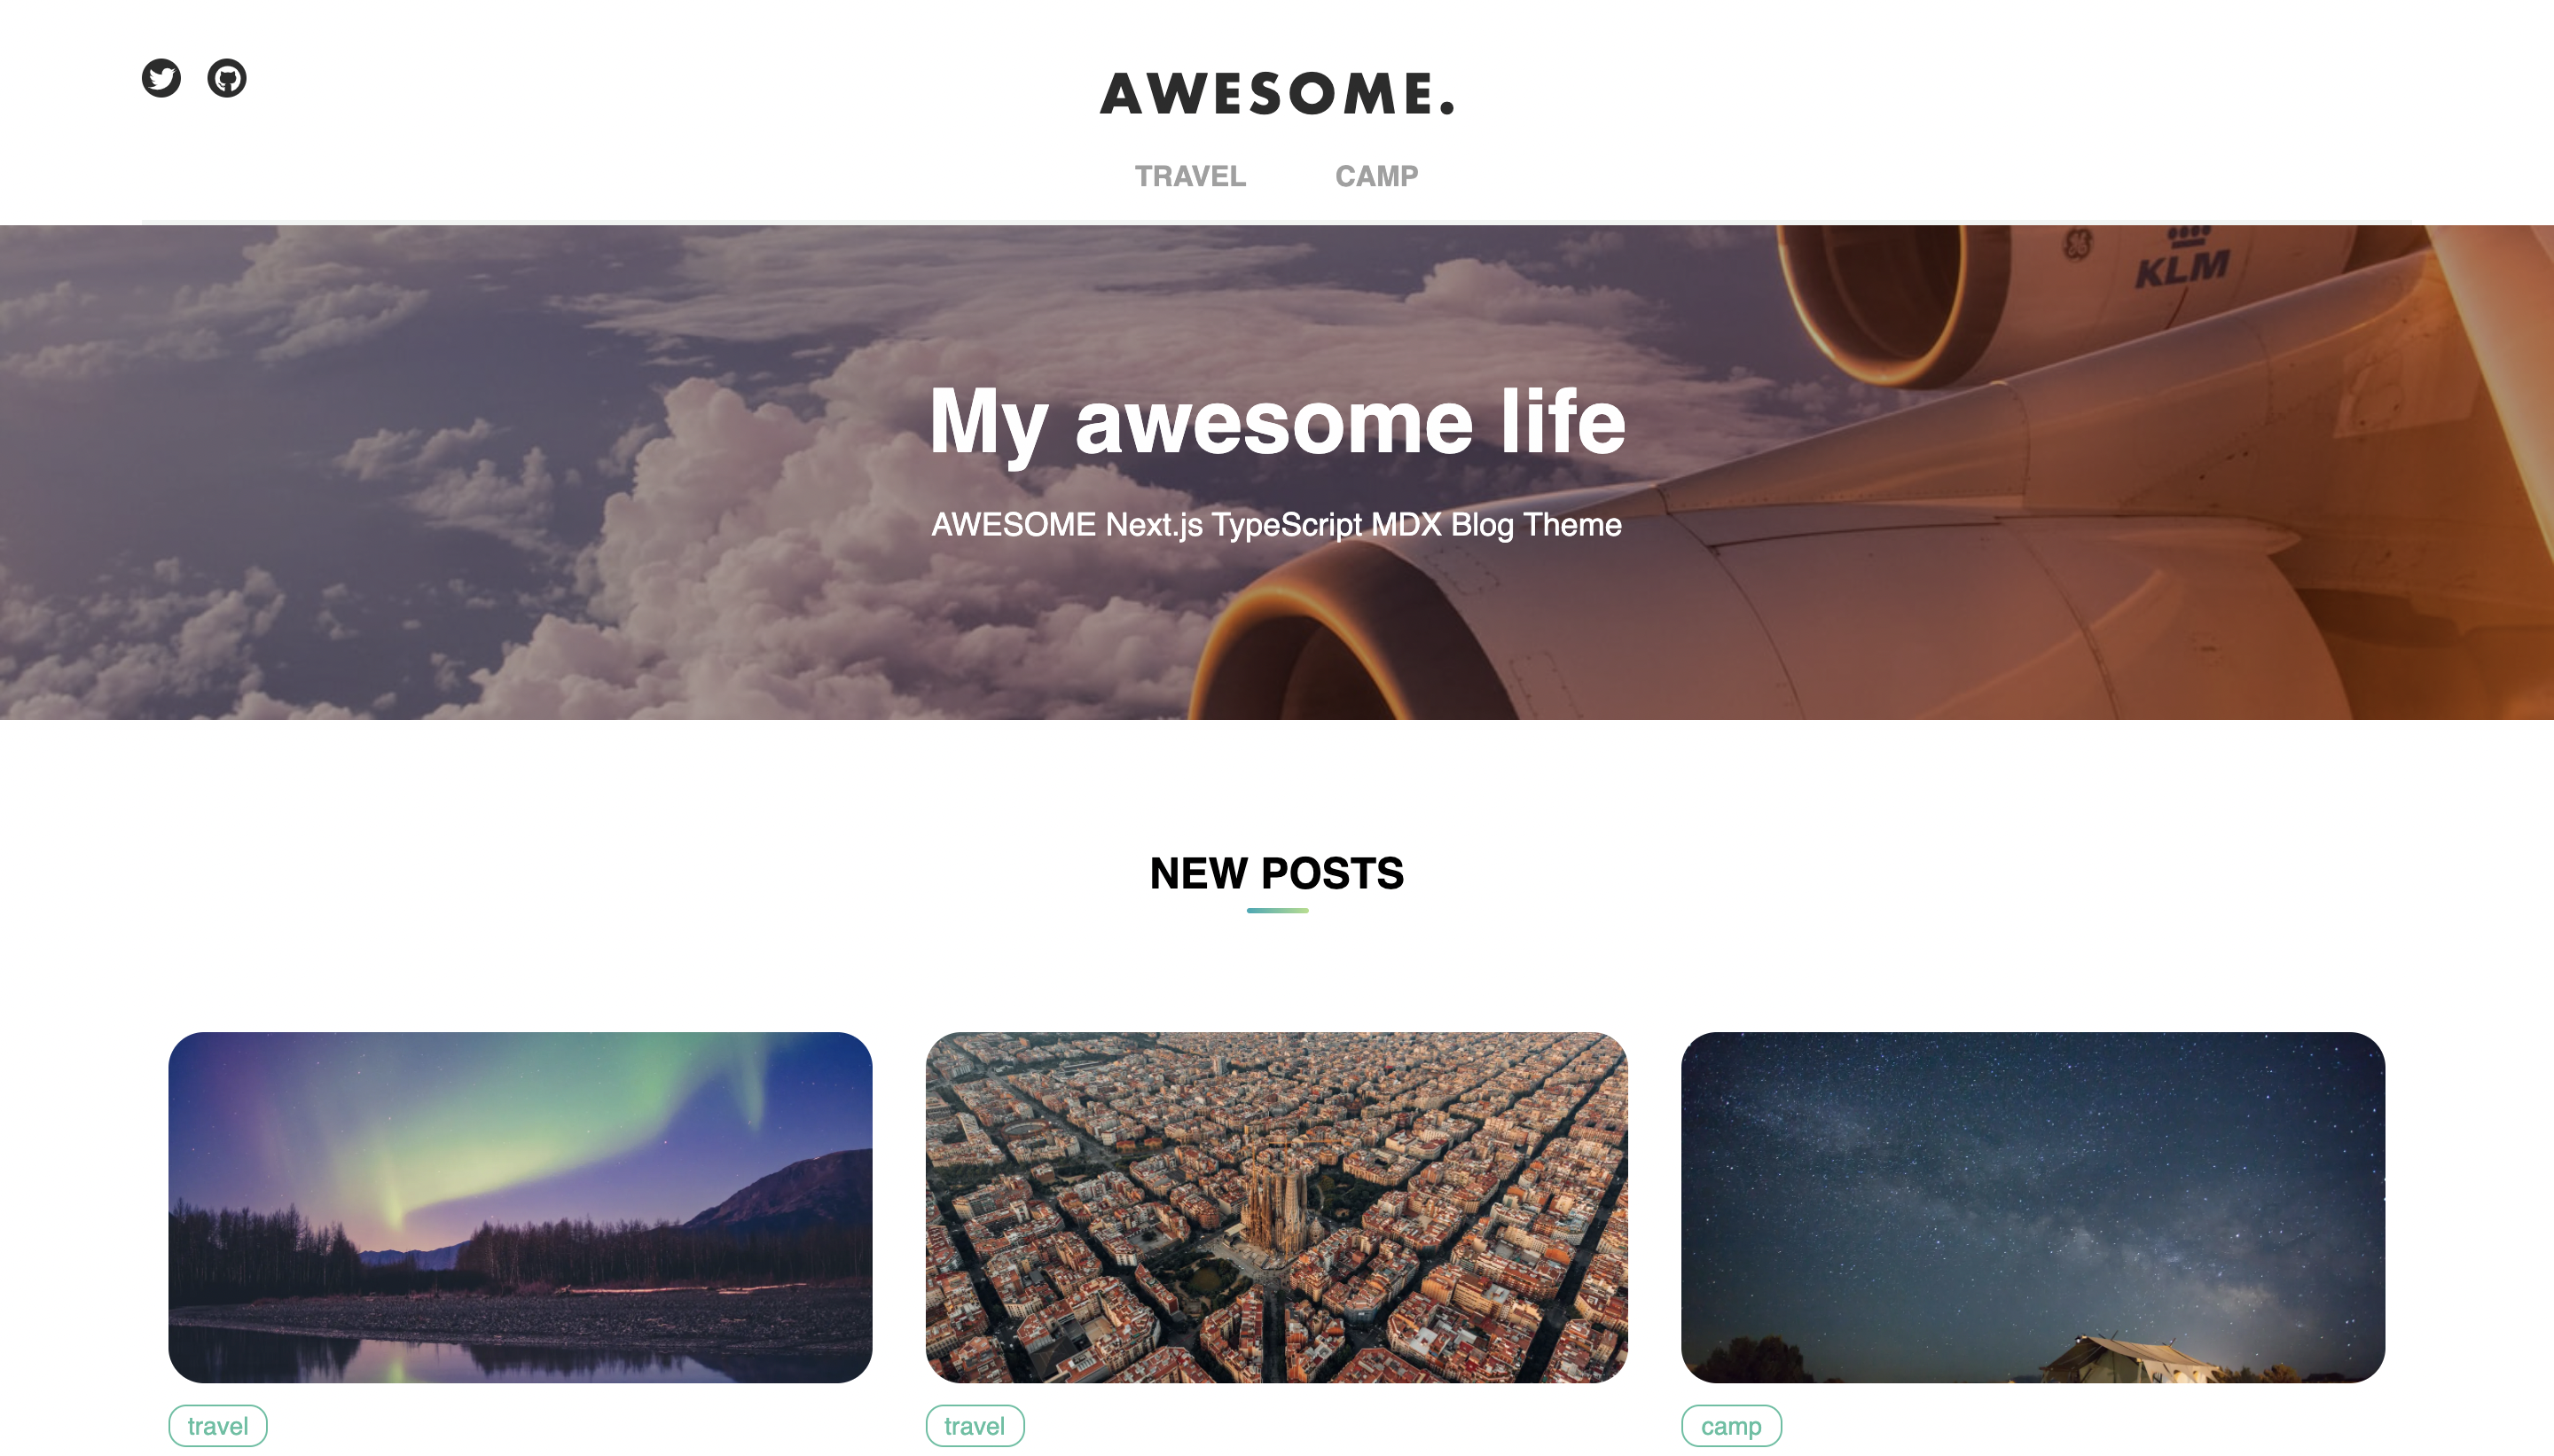
デモページ
https://theme-awesome.vercel.app/
GitHub
https://github.com/steelydylan/Awesome
モチベーション
- マークダウンファイルを作成/更新して、Gitを更新するだけでサイトをデプロイすること。
- ContentfulやStrapiなどのSaaSサービスなしで利用できるブログを目指しました。
- このサイトでもAWESOMEが使われています。
特長
- ハイパフォーマンス
- カスタマイズ可能
- TypeScriptとReact Hooksを使用した最新のアーキテクチャ
- SSGを使用したJamStack構成
必要なツール
Node.js, npm
テーマ構造
.
├── README.md                # README file
├── next.config.js           # Next JS configuration
├── blog.config.ts           # The theme's original configuration
├── next-sitemap.js          # Sitemap configuration
├── public                   # Public folder
│   └── assets
│       └── images           # Image used by the theme
├── components
│   ├── articles             # The components related to article
│   ├── buttons              # The components related to article
│   ├── common               # The common components
│   ├── layouts              # Layout components of the theme
│   ├── sides                # The components related to side column
│   ├── texts                # The components related to texts
│   └── utils                # The utility components
├── pages                    # Next JS pages
├── hooks                    # React hooks functions
├── styles                   # Global css directory
├── types                    # Type utilities
├── utils                    # Utility functions
├── .babelrc                 # Babel configuration to extends Next.js
├── .editorconfig            # Editor configuration
├── .eslint                  # JavaScript coding rule configuration
├── tsconfig.json            # TypeScript configuration
├── tsconfig.json            # TypeScript configuration
├── package.json             # Package configuration to install dependencies
├── yarn.lock                # Package configuration to install dependencies
└── vercel.json              # Vercel configuration to deploy the theme
始め方
依存関係のインストール
$ cd ./path/to/the/project
$ npm install
開発
$ npm run dev
好きなブラウザーで https://localhost:3300 を開いてください
デプロイ方法
GitHubを利用
GitHubを利用してGitHubの自分のレポジトリにダウンロードしたテンプレートのテーマをアップロードします。
GitHubは無料からご利用できます。
Vercel連携
次にNext.jsに最適化されたVercelのサービスを利用し、GitHubアカウントを連携します。
Vercelは無料からご利用できます。
Blog 設定
blog.config.tsを編集することで簡単にブログをカスタマイズすることができます。
blog.config.ts は以下のような定義ファイルです。
blog.config.ts
export default {
siteLogo: {
url: "/images/logo.svg",
width: "201",
height: "39",
},
siteName: "AWESOME",
title: "AWESOME",
description: "AWESOME Next.js TypeScript MDX Blog Theme",
styles: {
containerMaxWidth: "1280px",
colors: {
primary: "#50C0A1",
primaryGradient: "linear-gradient(to right, #06A9B7, #B0DE87)",
base: "#F2F4F3",
border: "",
bg: "#F7F7F7",
text: "#2C2C2C",
grayLighter: "#A0A0A0",
},
breakPoints: {
huge: "1440px",
large: "1170px",
medium: "768px",
small: "450px",
},
},
account: {
name: "Mr. AWESOME",
description: "profile here profile here profile here profile here",
image: `/images/me.png`,
social: {
twitter: "https://twitter.com/steelydylan",
github: "https://github.com/steelydylan",
},
},
hero: {
title: "My awesome life",
image: "/images/plane.jpeg",
description: "AWESOME Next.js TypeScript MDX Blog Theme",
},
navigation: [
{
name: "travel",
url: `/travel`,
},
{
name: "camp",
url: `/camp`,
},
],
article: {
defaultThumbnail: "/images/thumbnail.png",
articlesPerPage: 6,
},
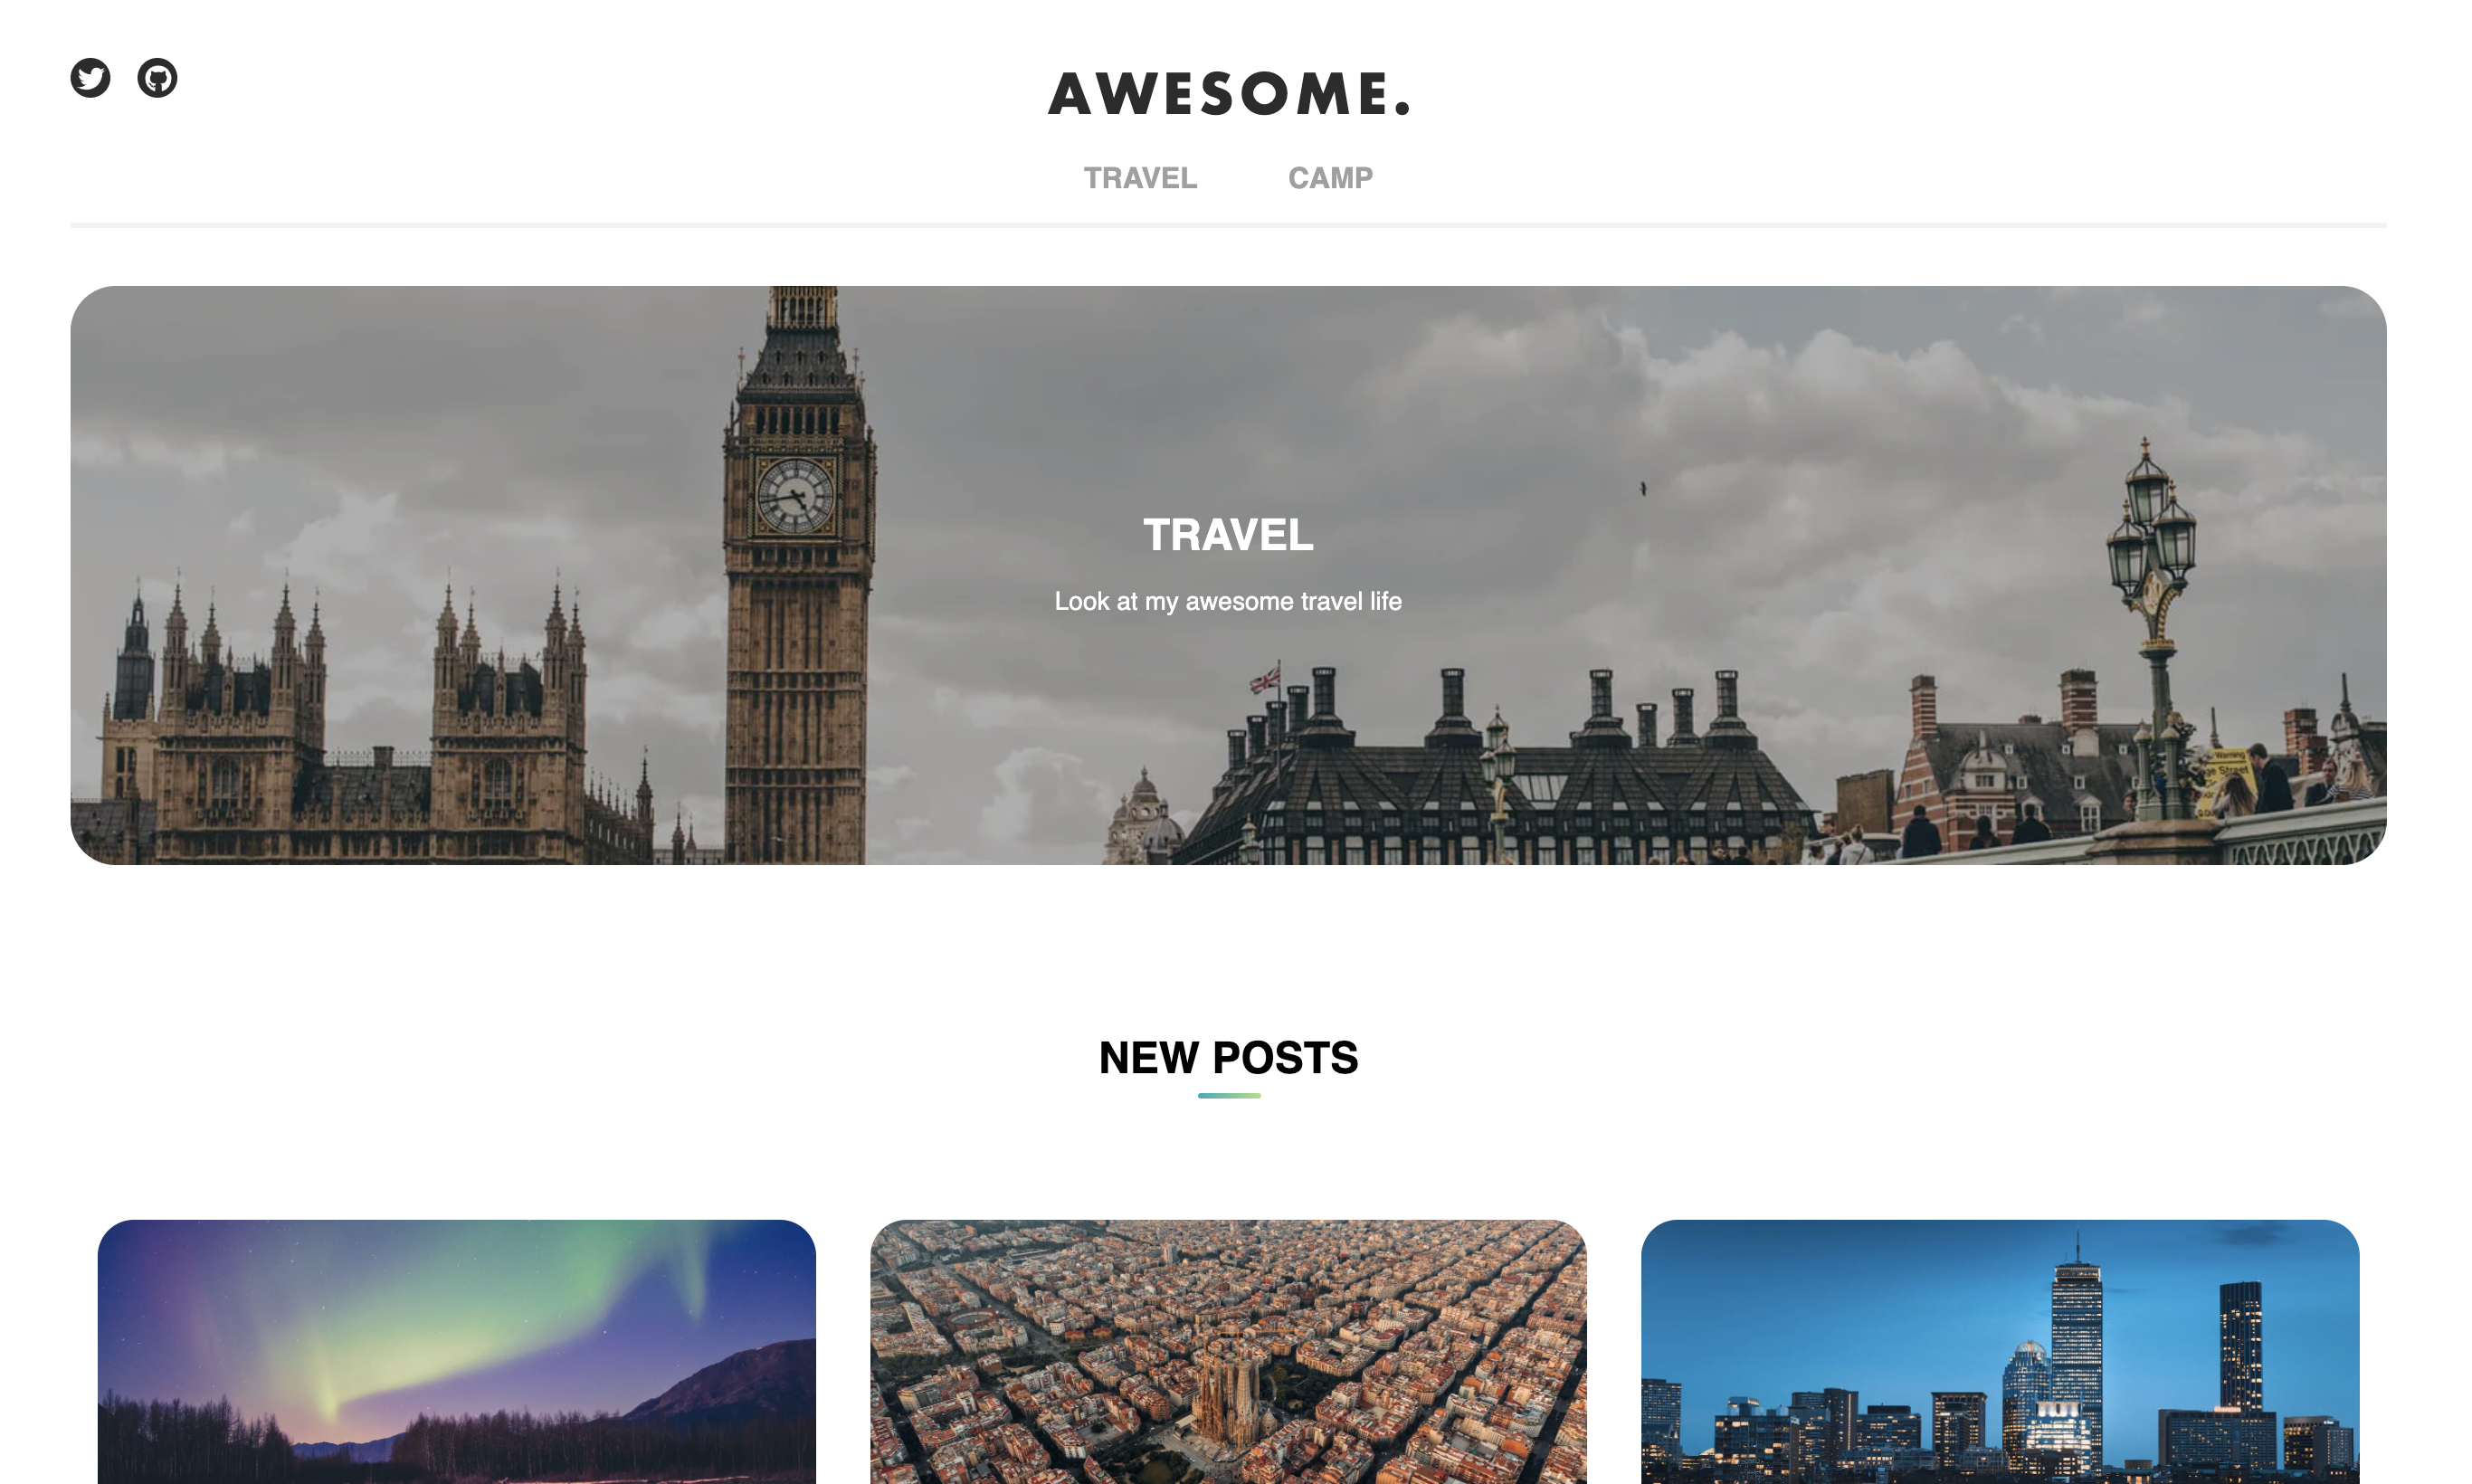
categories: [
{
id: "camp",
title: "Camp",
imagePath: "/images/camp.jpeg",
description: "Look at my awesome camp life",
},
{
id: "travel",
title: "Travel",
imagePath: "/images/london.jpeg",
description: "Look at my awesome travel life",
},
],
tags: [
{
id: "london",
title: "London",
},
{
id: "boston",
title: "Boston",
},
{
id: "paris",
title: "Paris",
},
{
id: "fire",
title: "Fire",
},
{
id: "sky",
title: "Sky",
},
],
};
siteLogoヘッダーのロゴ画像とそのサイズsiteNameSEOおよびOGPのサイト名 --titleタイトルタグdescriptionトップページの説明stylesサイトのCSS情報accountブログの作者の情報heroトップページのヒーロー画像navigationヘッダーナビゲーションarticle.defaultThumbnail各記事のデフォルトのサムネイルarticle.articlesPerPage各インデックスページの記事の番号writersidライターのidtitleライターの名前imageライターの画像URLdescriptionライターの説明
categoriesidカテゴリのスラッグ。URLに使用されますtitleカテゴリのタイトルimagePathカテゴリの画像URLdescriptionカテゴリの説明 -tagsidタグのスラッグ。 URLに使用されますtitleタグのタイトル
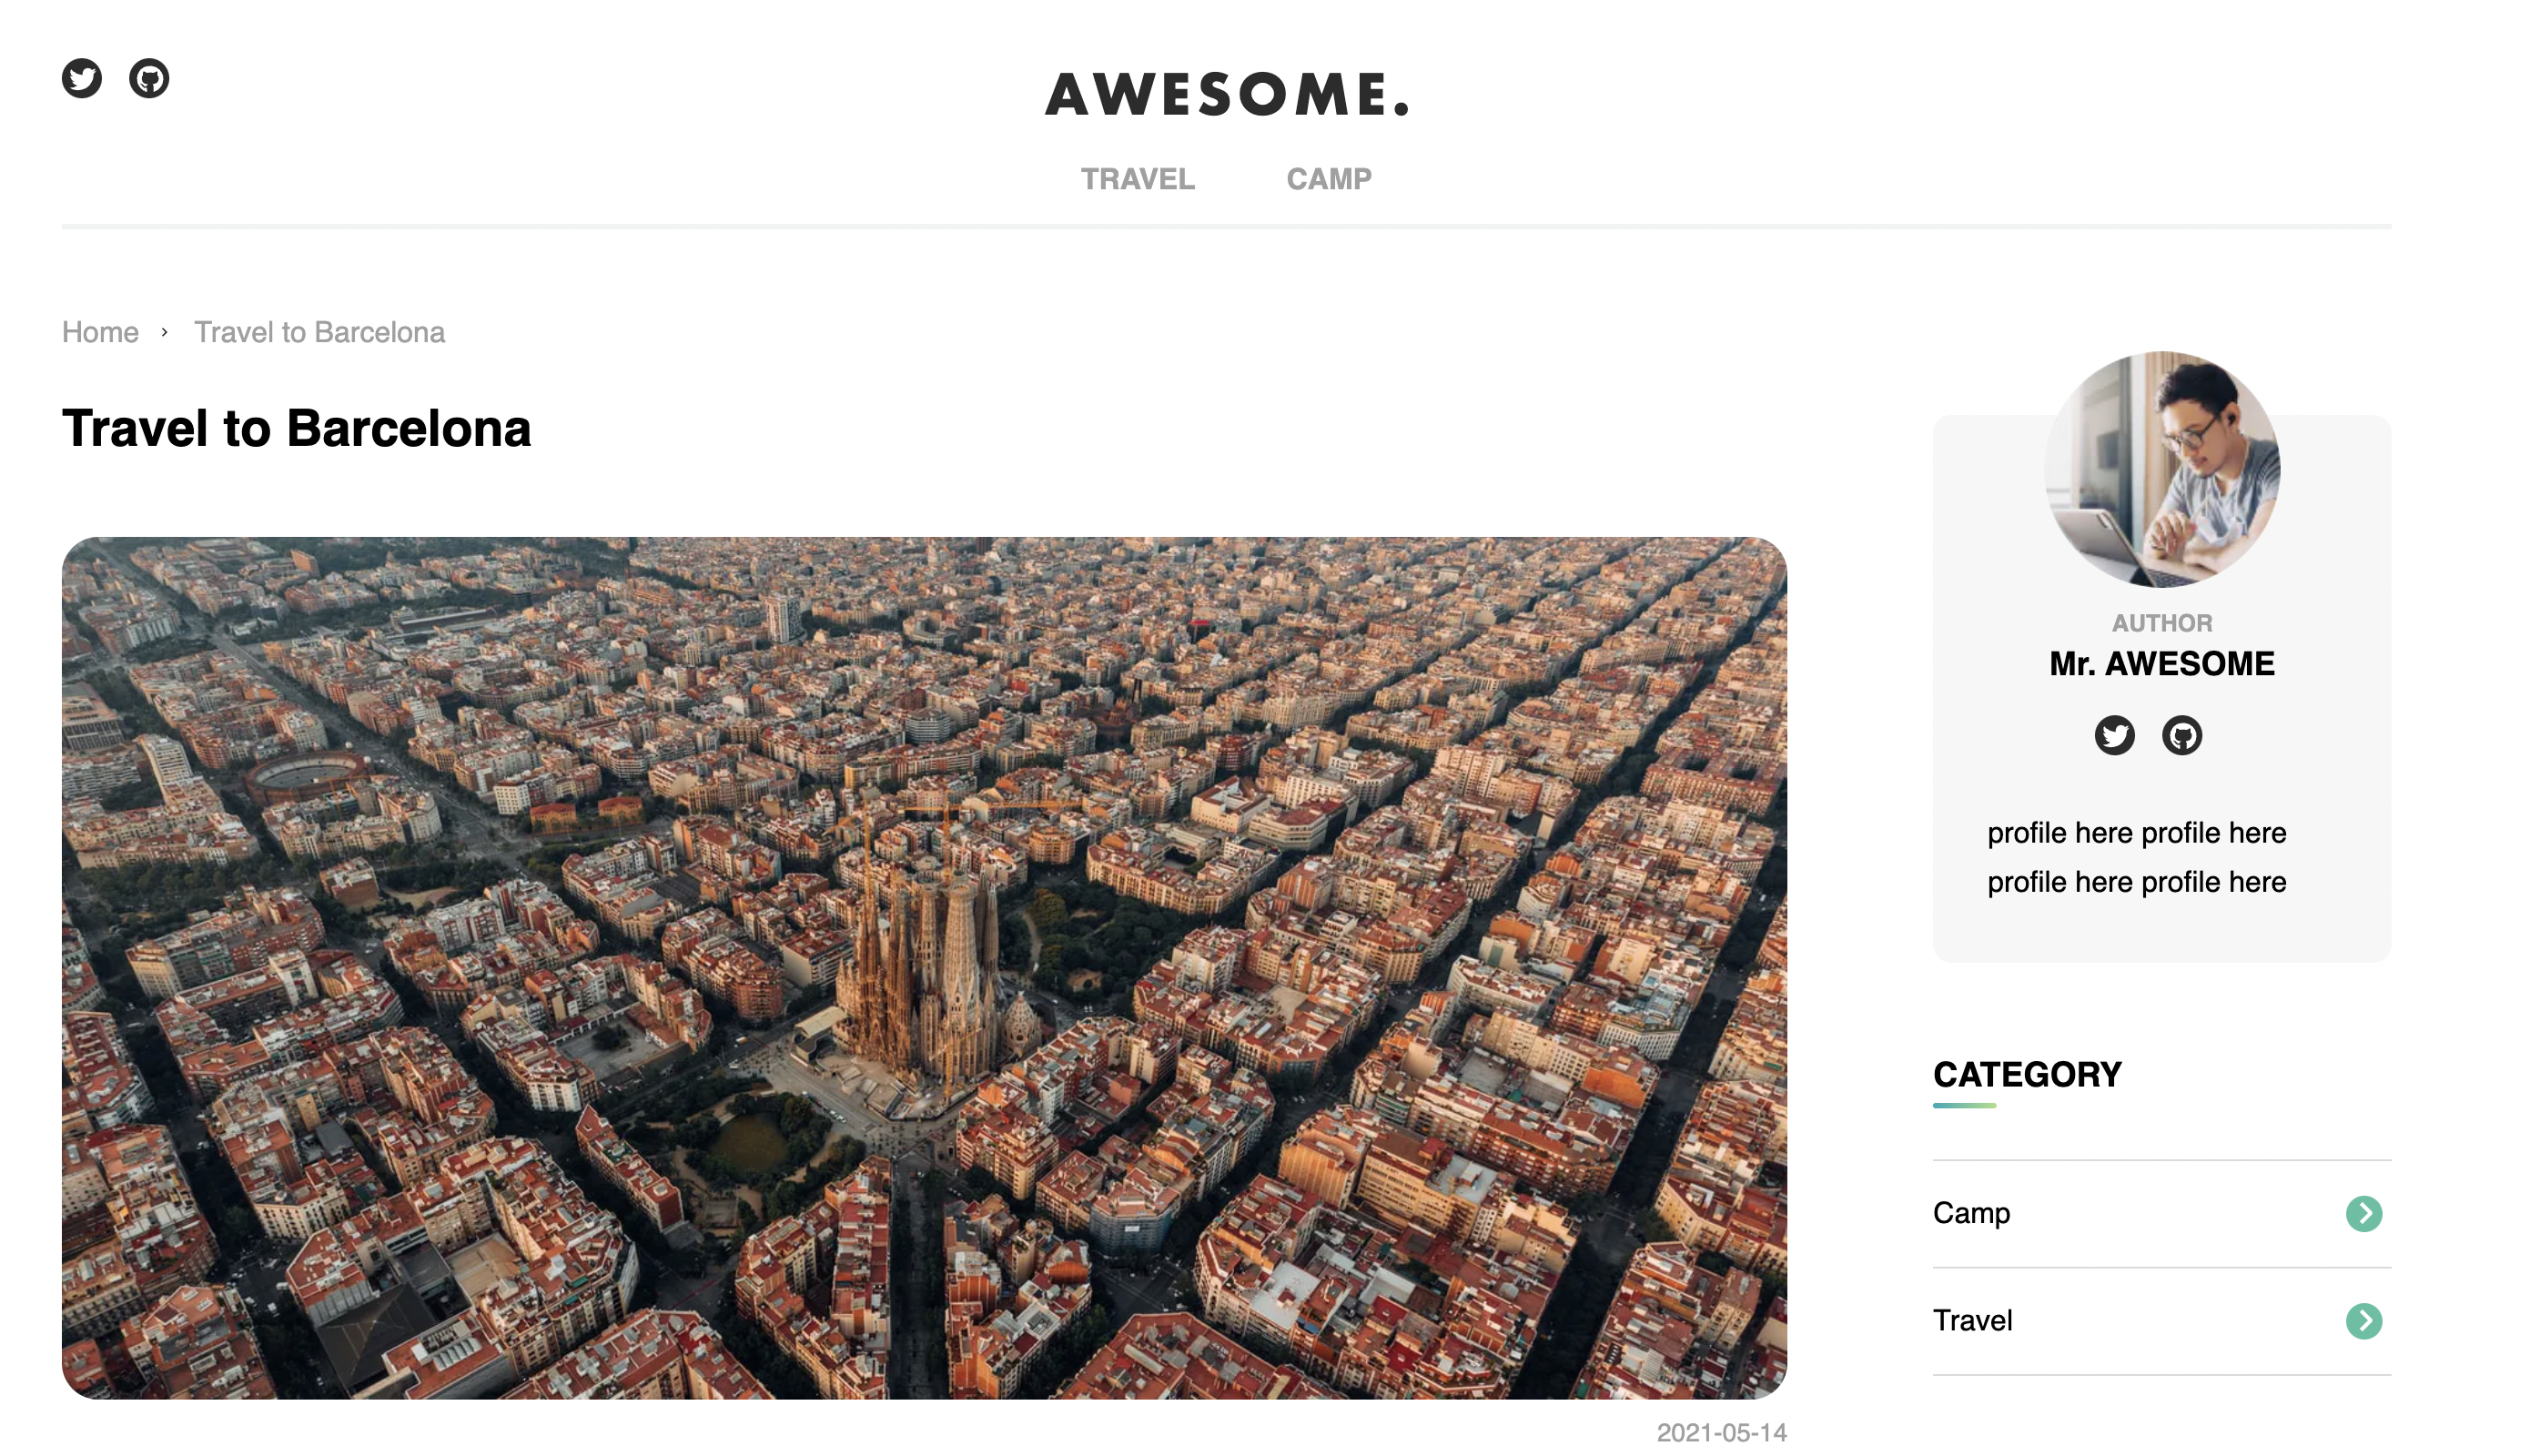
記事の書き方
MDXファイルを追加
次のパスにMDXファイルを追加します。 contents/***/index.mdx
MDXファイルはMarkdownとJSXが合体したファイルで、通常のマークダウンに加え、ReactのJSX気泡が使用できます。
詳しくはこちらをご覧ください。
https://mdxjs.com/
***の部分は記事のスラッグになります。
フロントマターについて
それぞれの記事のマークダウンには以下のようなメタ情報がフロントマターより設定可能です。
---
title: Awesome - Next.js Blog Theme
date: 2021-09-18
writtenBy: steelydylan
category: themes
tags: ["about"]
related: []
thumbnail: /images/awesome.png
---
title記事のタイトルdate記事の作成日付writtenBy記事の作者(writersで設定したidを使用)category記事のカテゴリー,blog.config.tsでcategoryに対して設定したidである必要があります。related関連記事, 記事のスラッグの配列を記述します。thumbnail記事のサムネイル画像へのパスdescription記事のディスクリプション
今後の課題
- 記事ではなく外部リンクに直接飛ばすメタ情報設定
- ナイトモード
- 追従目次
- 著者ページ
- 次の記事へのシリアルナビ
- 記事ごとに一覧に載せないオプション
- オフキャンバスメニュー
- ContentfulやStrapiなどへの対応

